 DVDneXtCOPY DVD Creator
VCR to DVD: 3 Transfer Methods, Costs, and Quality Tips

Summary: The popularity of VCRs declined during the 2000s, leaving users with no option but to convert VCR to DVD to play their cherished memories anytime. This article will introduce the best VHS storage techniques and a great VCR to DVD converter to help you copy VCR to DVD effortlessly.
Table of Contents
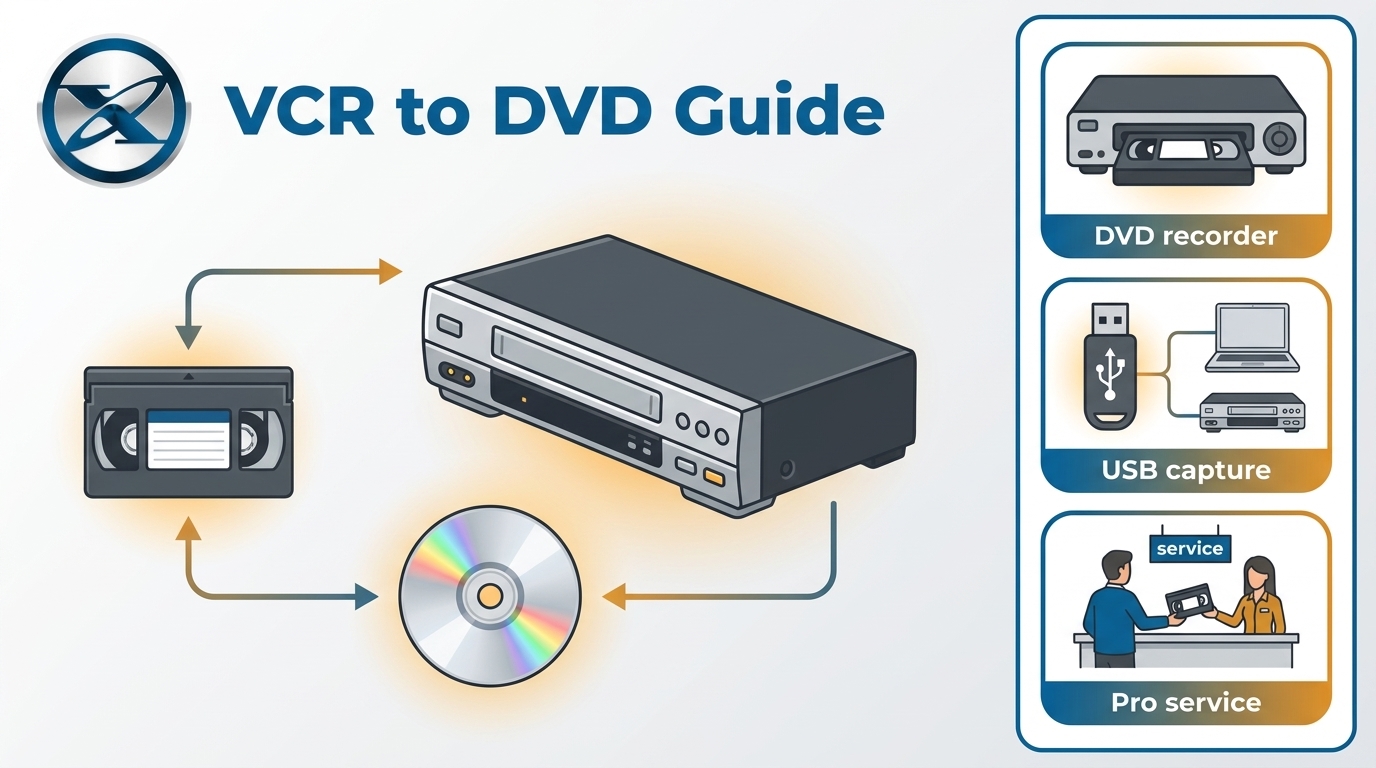
To convert VCR to DVD, a VHS tape must first play through compatible hardware. You can record it directly to a DVD recorder, capture it as a digital file before authoring a disc, or use a professional service. The right VCR to DVD transfer depends on your equipment, tape condition, collection size, budget, and whether you also want an MP4 backup.
Converting a tape preserves access and makes sharing easier, but it cannot restore picture detail or sound missing from the original recording. I would begin with one representative tape, check the playback, and choose a path only after seeing the actual picture and audio condition.
Before You Convert VCR Tapes to DVD
VCR and VHS Are Not the Same
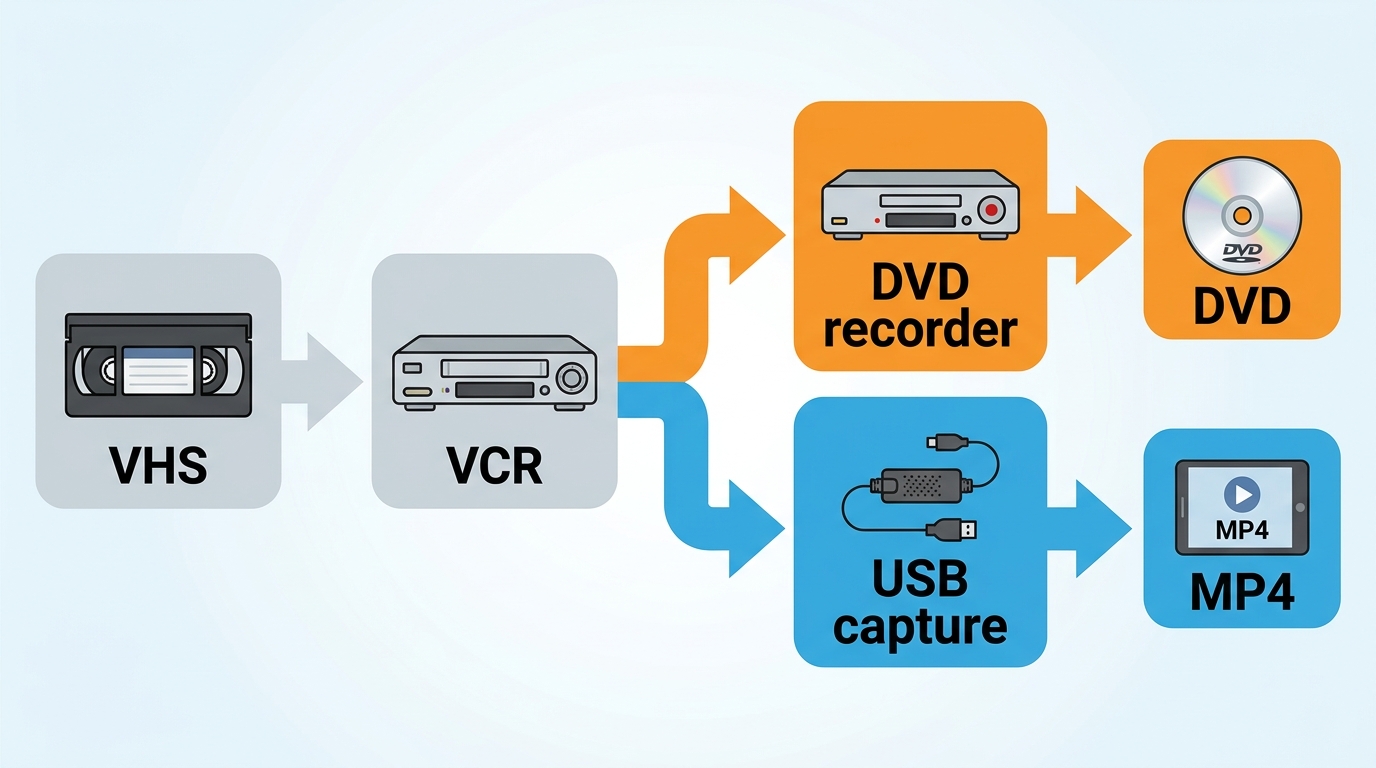
A VCR, or Video Cassette Recorder, is the machine that plays or records videotapes. VHS, short for Video Home System, is the tape format used by most consumer VCRs. In a VCR-to-DVD setup, the VCR provides playback, while a recorder or capture device receives the analog signal.
Before transferring a tape, inspect the shell for cracks, mold, loose tape, or a damaged flap. Rewind it if needed, insert it into a compatible deck, and play a short section. Look for a stable picture and listen for clear audio before committing to a full capture or buying equipment for an entire collection.
A VCR and a VHS tape work together, but neither can send video into DVD-authoring software by itself. The tape must be played and recorded through a DVD recorder or capture device first.
Three Ways to Transfer VCR to DVD
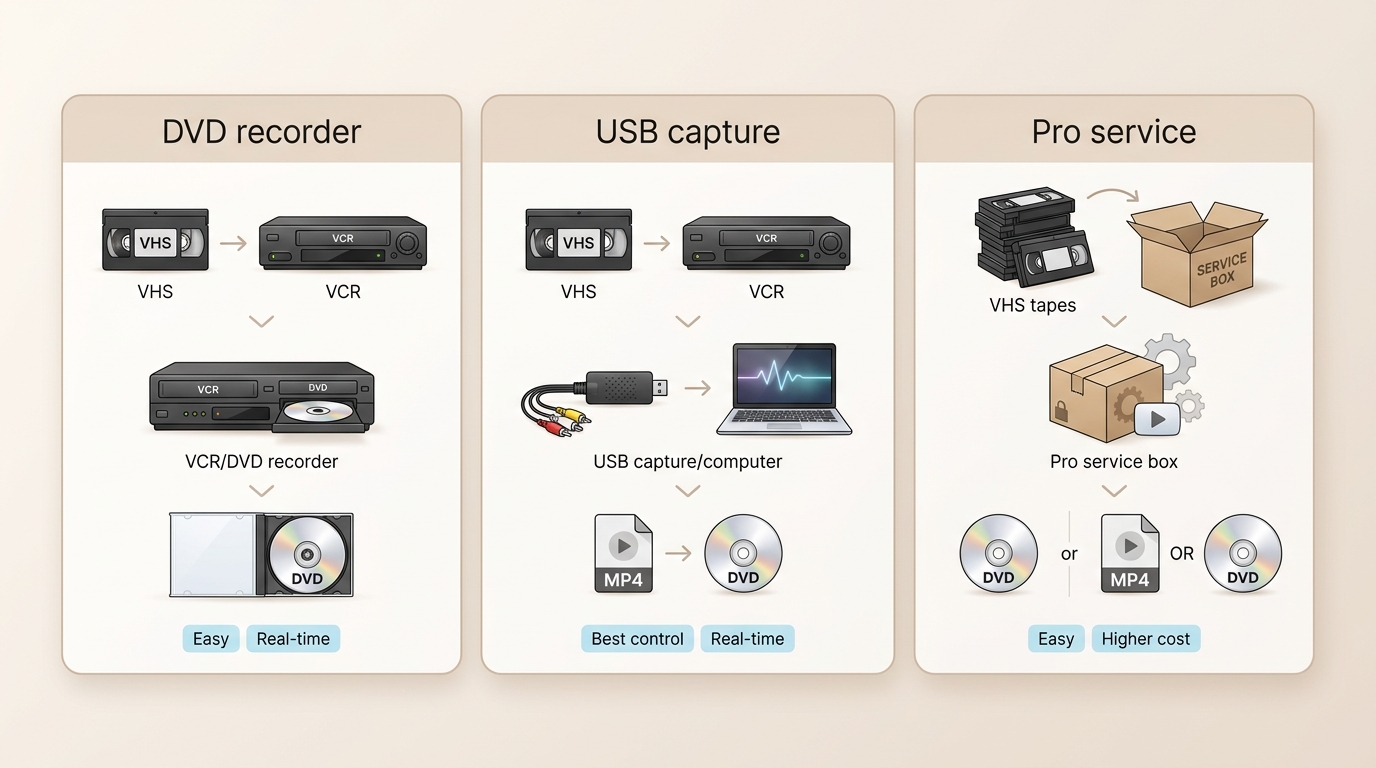
There are three practical ways to transfer VCR to DVD: record directly to a DVD/VCR combo or standalone DVD recorder, capture the tape to a digital file and author the DVD afterward, or use a professional transfer service. Tape playback happens in real time in each home method, so a two-hour tape generally needs about two hours to play before later authoring or burning begins.
| Method | Required hardware | Captures analog tape directly | Typical output | Time commitment | Cost model | Quality control | Best fit |
|---|---|---|---|---|---|---|---|
| DVD/VCR combo or standalone DVD recorder | Working VCR or combo unit, blank recordable DVDs | Yes | Playable DVD | Real-time recording, plus finalizing the disc | Equipment and blank-media cost | Limited settings; check the finished disc | Simple playback copies for a small collection |
| USB or standalone digital capture | Working VCR, composite or S-Video/audio cables, capture device, computer or storage target | Yes | MP4 or another digital file, then DVD, ISO, or folder if needed | Real-time capture, followed by authoring | Hardware cost and hands-on time | More control over files, edits, and copies | Large collections or readers who want a digital master |
| Professional transfer service | Tapes and a service order | Handled by the service | DVD, digital delivery, USB, or cloud options depending on the provider | Service queue, processing, and possible shipping time | Usually priced by tape, bundle, and delivery option | Less direct control over capture choices | Fragile tapes, no playback hardware, or limited time |
For a few tapes and a working recorder, direct recording is the simplest route. I would choose home capture for a larger collection because it keeps a reusable digital file. A service is often the sensible choice for fragile tapes or when no compatible playback hardware is available.
Equipment and Connections for Home Capture
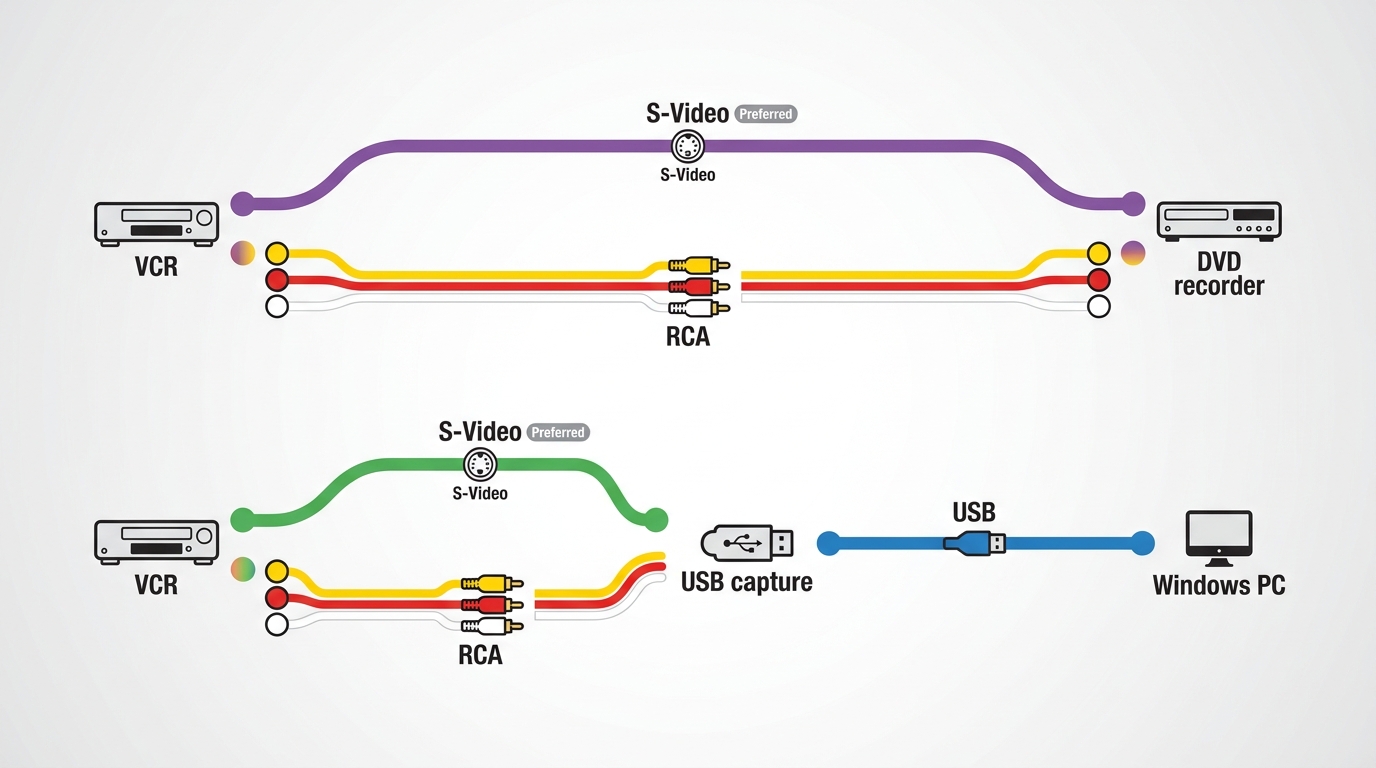
For VHS to DVD at home, you need a working compatible VCR, RCA composite video and left/right audio cables, plus either a DVD recorder or a capture device. If both the VCR and capture hardware support S-Video, use it with separate audio cables for a cleaner signal path. It may improve the connection, but it cannot add detail that was not recorded on the tape.
Connect the VCR's video and audio outputs to the recorder or capture device inputs. For computer capture, connect the device to the computer and select it in the capture software. Cue the tape, start recording on the destination device, then press Play on the VCR. Watch the preview for picture stability and audio. Stop the recording after the tape ends, save the digital file, and check a few points near the beginning, middle, and end.
- Playback Deck: Use a compatible VCR that plays the tape cleanly before starting a full transfer.
- Video Connection: Connect composite video, or S-Video when both devices support it, from the VCR to the recorder or capture device.
- Audio Connection: Connect the left and right RCA audio outputs so the capture includes sound.
- Capture Destination: Choose a DVD recorder for direct discs or a capture device and computer for a digital file.
- Blank Media: Use blank recordable DVDs that match the recorder when making a direct DVD.
- Start Order: Start recording first, then press Play on the VCR to avoid missing the opening seconds.
- Preview Check: Watch the preview for rolling images, dropped frames, or missing audio before continuing.
- File Check: Save the capture and play sections from across the recording before authoring a DVD.
Capture First, Then Author the DVD
After you capture the VHS footage as a supported digital video file, DVDneXtCOPY DVD Creator can create a DVD-Video disc, ISO image, or DVD folder. It does not directly capture an analog VHS signal. It is a second-stage option for readers who already have captured home-video files and want a playable DVD.
DVDneXtCOPY DVD Creator boasts support for 200+ video formats and making conversions possible in DVDs, ISO images, and folders. Its customization options help give your DVDs a professional look with a wide range of stylish menu templates, where you can add thumbnails, text font, background art, and so on. In addition, it retains the meta information of the source video for easy playback on any device. Furthermore, DVDneXtCOPY offers 50x faster DVD burning speed with GPU hardware acceleration to burn multiple video formats to a single DVD at once
Supported OS:
How to Author a Captured Video File to DVD with DVDneXtCOPY DVD Creator:
Step 1: Open DVDneXtCOPY DVD Creator on a supported Windows computer and select the Creator module. Load the digital video file created during VHS capture. Confirm that the runtime and preview match the tape footage you intended to use.

Step 2: Select the audio track, subtitles, disc type, and aspect ratio that match your captured video. Preview the title before continuing. If the picture looks stretched or the wrong audio plays, return to these settings before burning.

Open Menu Settings to choose a menu template or create a no-menu disc. You can adjust text, thumbnails, backgrounds, and buttons; a dedicated DVD menu creator overview can help if menu design is your main task.

Step 3: Select a compatible blank DVD drive, or use Save to to create an ISO image or DVD folder first. An ISO or folder lets you inspect the result before using blank media.
Step 4: Press Start to begin authoring and burning the captured video. When it finishes, play the DVD in the intended player and check the menu, picture, audio, and chapter points.
DVD, MP4, and Quality Decisions
Choose DVD, MP4, USB, or Cloud
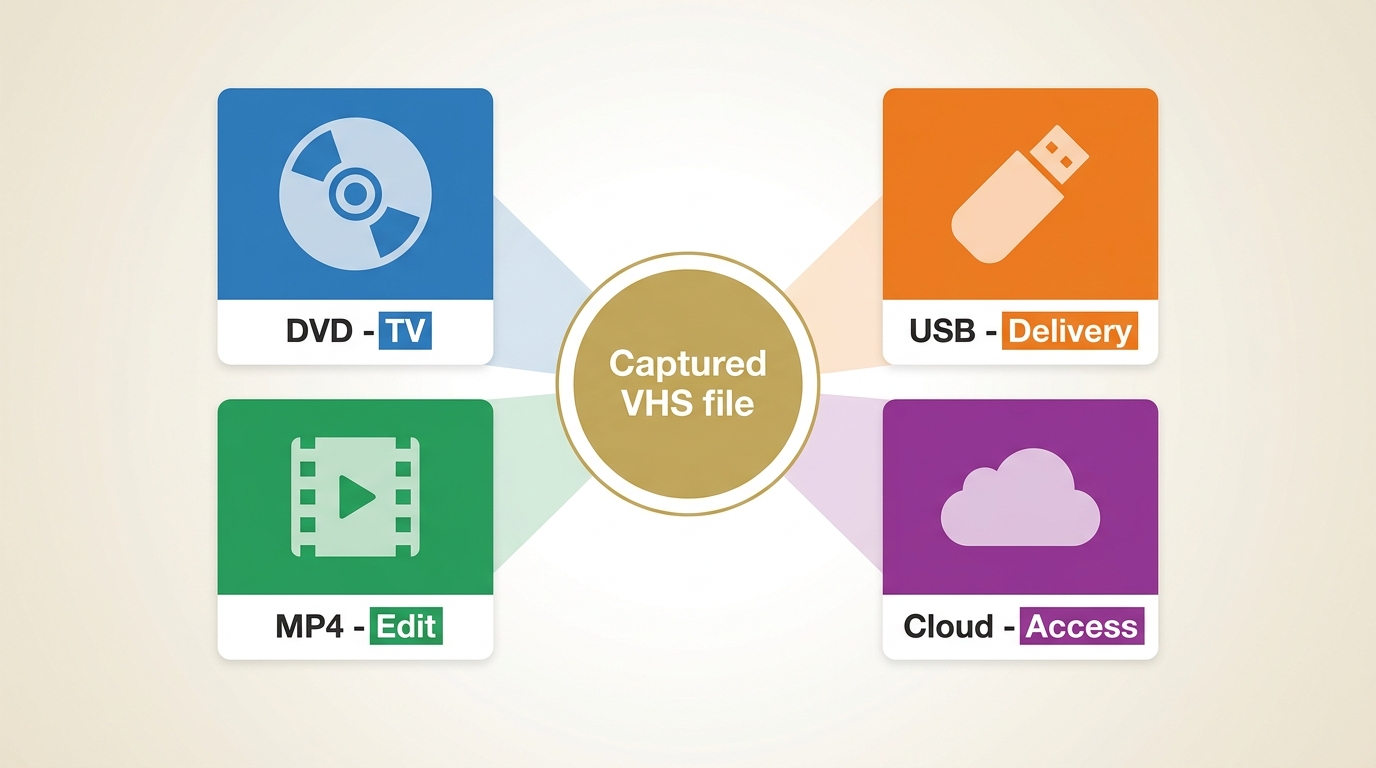
DVD works well as a familiar playback copy with menus and chapter access. MP4 is usually more convenient for backup, editing, sharing, and making additional copies later. A USB drive or cloud storage can make digital files easier to deliver or access, but they are storage or delivery choices, not replacements for a checked backup.
I would treat a DVD as a delivery copy, not the sole preservation copy. Keep the captured digital master as well, especially if the recording is important enough that you may want a new disc or file format later.
Prevent Quality and Audio Problems
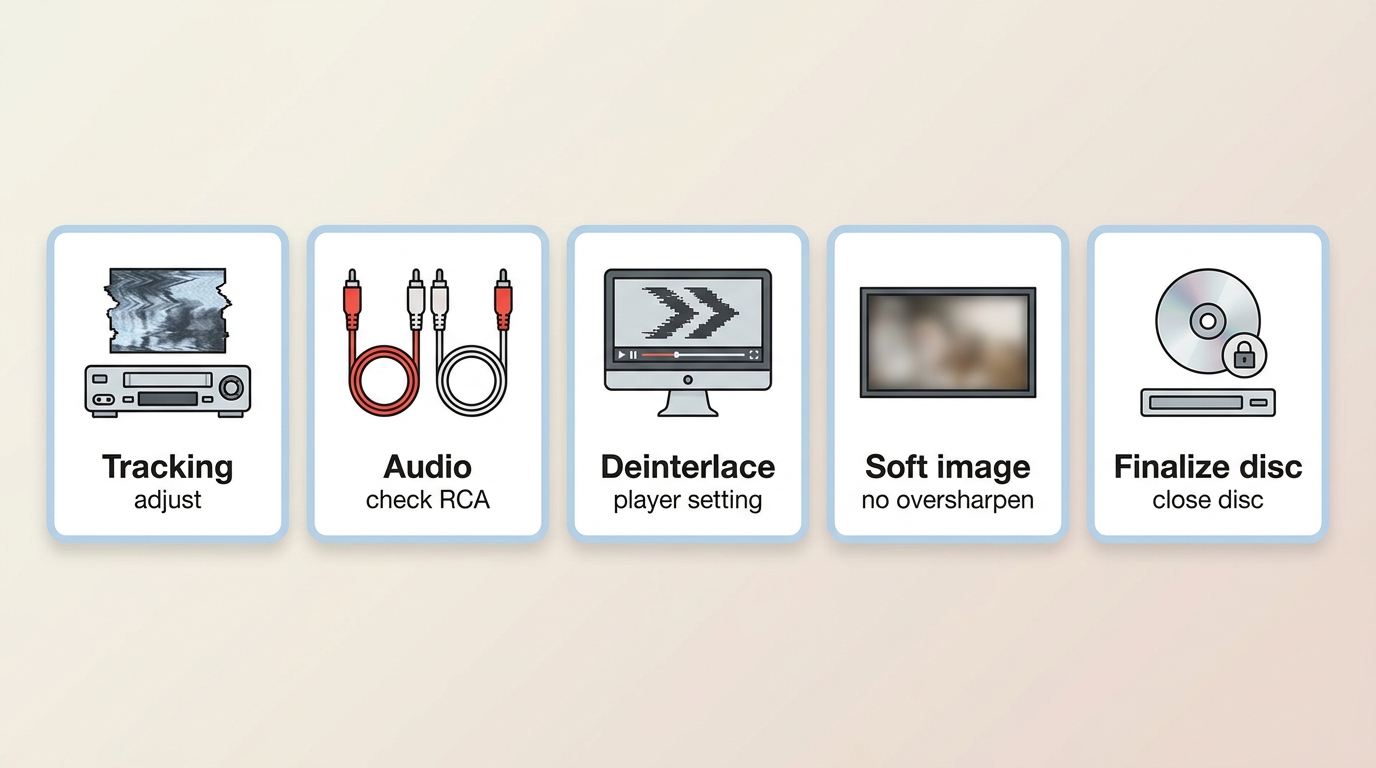
Capture quality depends on the tape, the playback deck, the cables, the capture hardware, and the settings. Start with a short recording and check it before processing an entire collection.
- Unstable picture: Stop and adjust the VCR tracking. A dirty or worn deck can also cause streaks, noise, or dropouts.
- Missing or drifting audio: Check both RCA audio connections, capture-device settings, and a longer sample of the recording before continuing.
- Jagged motion on a computer: Use deinterlacing for digital viewing when the capture software or player offers it.
- Soft picture: VHS has limited source detail. Avoid excessive sharpening, which can make noise and edges look worse.
- DVD will not play elsewhere: Use compatible blank media, complete the burn, and finalize a direct-recorded DVD before testing another player.
A clean, stable, synchronized capture matters more than chasing an artificially sharp image. If the tape shows mold, severe damage, or repeated playback problems, stop rather than risk further damage and consider a professional transfer service.
Preserve a Digital Master
For one important tape or a large collection, use more than one copy. Keep the original tape when practical, save a high-quality digital master, place a backup on separate storage, and create a DVD or shareable file when needed. Digitization makes footage easier to access, copy, and share, but image and sound quality remain limited by the original tape and capture chain.
- Keep the Original: Retain the tape when practical, especially until you have checked the completed digital copy.
- Create a Digital Master: Save the captured video file before making a DVD so you can create another copy later.
- Use Separate Storage: Keep a backup on a separate drive or another storage location to reduce single-copy risk.
- Make a DVD Copy: Use a DVD when familiar disc playback or a menu-based family copy is useful.
- Save a Shareable File: An MP4 file is often easier to edit, copy, send, or play on current devices.
- Check the Capture: Review picture stability, audio, and runtime before deleting any temporary files.
- Label Clearly: Name files and discs with dates, events, and people so they remain easy to identify.
- Plan for a Small Collection: A direct DVD recorder may be enough when you need only a few simple playback copies.
- Plan for Many Tapes: A digital capture setup gives you more reusable files when transferring a larger collection.
- Consider a Service: A professional transfer service can be practical for fragile tapes or when you do not have a compatible VCR.
FAQs about Converting VCR to DVD
Professional VHS transfer pricing varies by provider, tape count, output choice, shipping, and optional services. Some services price each tape, while others use bundles or add charges for DVDs, USB drives, digital downloads, or cloud delivery. As of July 2026, compare the complete order total and delivery format instead of relying on one universal per-tape price.
Home movies and other material you are authorized to copy are the clearest use cases for a VHS-to-DVD transfer. Copyright and copying rules vary by location and by the material involved, so do not use the process to distribute, sell, or provide copies of content to third parties.
Compatible playback hardware is still required somewhere in the chain. If you do not own a VCR or compatible camcorder, you can borrow or buy a working deck, use a DVD/VCR combo unit, or choose a professional transfer service that supplies the playback hardware.
Retail photo and transfer services may accept VHS and related analog formats through participating locations or mail-in ordering. Available formats, digital delivery choices, DVD options, and turnaround can differ by service and location. This route is useful when you prefer to hand off the hardware and capture work, although you have less control over the transfer settings.
Conclusion
Choose your VCR-to-DVD path by checking the tape condition, the number of tapes, the playback hardware you already have, the output you want, and the time and budget you can commit. Use direct recording for simple DVD copies, capture to a digital master when you want files you can keep and share, and consider a professional service for fragile tapes or no-hardware situations. Analog capture is normally real time; DVD authoring and burning are separate steps that follow.
![Top 8 Best MP4 to DVD Converters on Windows & Mac [2026 Tested]](https://images.dvdnextcopy.com/2026/09/17/I2v69nzxIF6Xn7iue3ZRMGJ5-Ls0SF_z/feature_cover.jpg) Luna MillerSep 21, 2026
Luna MillerSep 21, 2026Top 8 Best MP4 to DVD Converters on Windows & Mac [2026 Tested]
 Luna MillerSep 21, 2026
DVD Region Codes Explained: Region 1 and Playback Options
![How to Remove DVD Copy Protection: Software and Free Methods [2026]](https://c.dvdnextcopy.com/media/How_to_Remove_DVD_Copy_Protection_d24c38a790.png) Steven VanceSep 21, 2026
Steven VanceSep 21, 2026How to Remove DVD Copy Protection: Software and Free Methods [2026]
 Luna MillerSep 21, 2026
How to Rip a Copy-Protected DVD on Win & Mac: 6 Ways
 Steven VanceSep 18, 2026
Top MP4 to ISO Converter in 2026: DVD Authoring vs Online Tools
 Steven VanceSep 18, 2026
How to Digitize DVD Collection: 5 Ways in 2026