 DVDneXtCOPY DVD Ripper
How to Fix a Scratched DVD: 5 Safe Repair Steps

Summary: This guide shows how to inspect a scratched DVD, clean it from the center outward, rescue readable data before polishing, and rank home repair methods by risk. It also explains when local resurfacing, a repair kit, or professional recovery is the better next step.
Table of Contents
When a scratched DVD begins skipping, my first concern is preserving what the drive can still read, not reaching for toothpaste. The safest answer to how to fix a scratched DVD is to inspect, clean, rescue readable data, try one cautious repair, and then escalate.
This DVD repair sequence separates residue from surface damage, explains when software can help with scratched DVD recovery, and sets a clear stop rule before another attempt makes the disc harder to read.
Check Whether the DVD Is Repairable
A scratched DVD may need only cleaning, but deep DVD scratches, visible splits, warping, or repeated read failures call for a stop. Scratch direction, depth, playback symptoms, and the disc's value should determine the next step.
- Dirt or fingerprints: clean first; do not polish.
- Light radial scratch: rescue readable data, then test one cautious method.
- Scratch following the data track: higher read-error risk; stop early.
- Deep, clustered, label-side damage, visible splits, or warping: do not polish.
- Irreplaceable disc or repeated read failure: use a specialist data service or replace it.
A 30-Second Repairability Check
Hold the disc by its hub and Edge under a bright, diffuse light. Look for fingerprints, cloudy residue, light lines, deep grooves, clusters of damage, splits near the hub, and any change in shape.
- Dirt or residue: clean the disc before judging the surface.
- Readable with occasional skips: rescue the readable data before polishing.
- Unreadable in more than one compatible drive: software is unlikely to help.
- Split, warped, deeply gouged, or irreplaceable: skip home repair and ask for a specialist assessment.
On a Windows 11 Pro 64-bit PC with a Pioneer BDR-XD08UMB-S drive, I use the appearance of a stable title list as the go-or-stop signal. If the drive cannot identify the disc, I do not treat software as a physical repair method.
Why Scratch Direction Matters
Radial scratches cross the data path briefly, while curved or circular scratches can follow it for longer and trigger repeated read errors. A single-sided DVD's metal and data layers sit near the center of the disc structure, not on the top surface, so depth and location matter as much as appearance.
When deciding how to fix a skipping DVD, watch whether the freeze repeats at the same scene. A repeatable failure points to a damaged area; random skips may still come from dust, residue, the drive, or the player.
Clean the Disc Before Any Repair
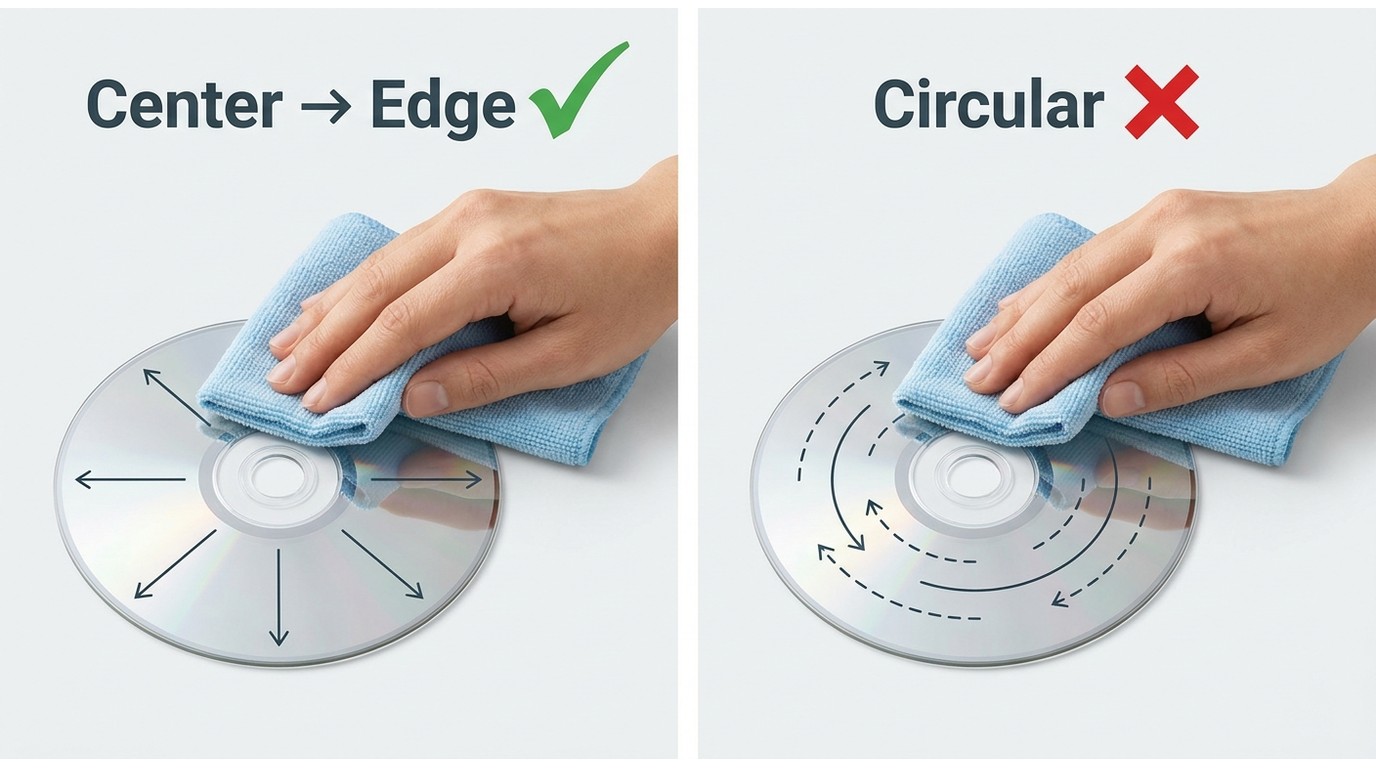
Cleaning is the lowest-risk DVD scratch repair step because fingerprints and residue can look like damage. Treat a DVD cleaner and scratch remover as a cleaning aid, not proof that the scratch itself has disappeared.
Use a Center-to-Edge Wipe
- Inspect the read side under good light and remove loose dust with clean air or a very soft brush.
- Dampen a clean microfiber or lint-free cloth with water. Use a small amount of diluted mild dish soap only for stubborn residue.
- Support the disc at the hub and wipe in straight lines from the center toward the outer Edge.
- Use a clean damp section of the cloth to lift remaining soap.
- Let the disc dry fully before loading it in a player or drive.
Center-to-Edge strokes limit the length of any accidental mark across the data path. Circular wiping can create track-following damage, so it is the wrong motion even when the cloth feels soft.
Stop if Cleaning Changes Nothing
If the same skip or read error remains after one careful clean, stop washing the disc. Test it in another compatible drive if one is available, then move to data rescue or professional resurfacing instead of repeating the same contact.
I stop after one complete clean when the error repeats at the same point. More wiping adds contact but provides no new evidence about whether the problem is residue or physical damage.
Rescue Readable Data Before Polishing
Scratched DVD recovery should begin while the drive can still read the disc. Save the broadest clean copy first, then create a convenient playback file after the source has been secured.
Choose the Safest Rescue Output
A DVD to ISO copy or another disc image preserves the source structure and may retain more readable material than a direct transcode. DVD to MP4 output is easier to play, but conversion can stop when it reaches a damaged sector. MKV is another local-file choice when track selection matters.
- Disc image or passthrough copy: choose this when preserving the maximum readable source matters.
- MP4 or MKV: choose a playback file after the drive completes a clean read.
- Failed transcode: return to the rescued source instead of polishing the original again.
If you already use DVDneXtCOPY DVD Copy, the same rescue-first rule applies: create the broadest readable copy before asking a transcoder to process every damaged area.
On the same Windows 11 Pro 64-bit system, I open the rescued image in VLC and inspect its tracks with MediaInfo. A title that opens with the expected audio, subtitles, and chapters is ready for a full playback check; a repeatable stall marks the damaged region.
Know When Software Cannot Help
Software cannot flatten a groove, close a split, or rebuild physically lost data. It can copy sectors the drive still reads, sometimes with retries, but a disc that never mounts or repeatedly disconnects needs professional recovery or replacement.
Do not keep reloading a split or warped disc. Physical failure at drive speed can damage the disc further and may also affect the drive.
Repair Methods Ranked by Risk
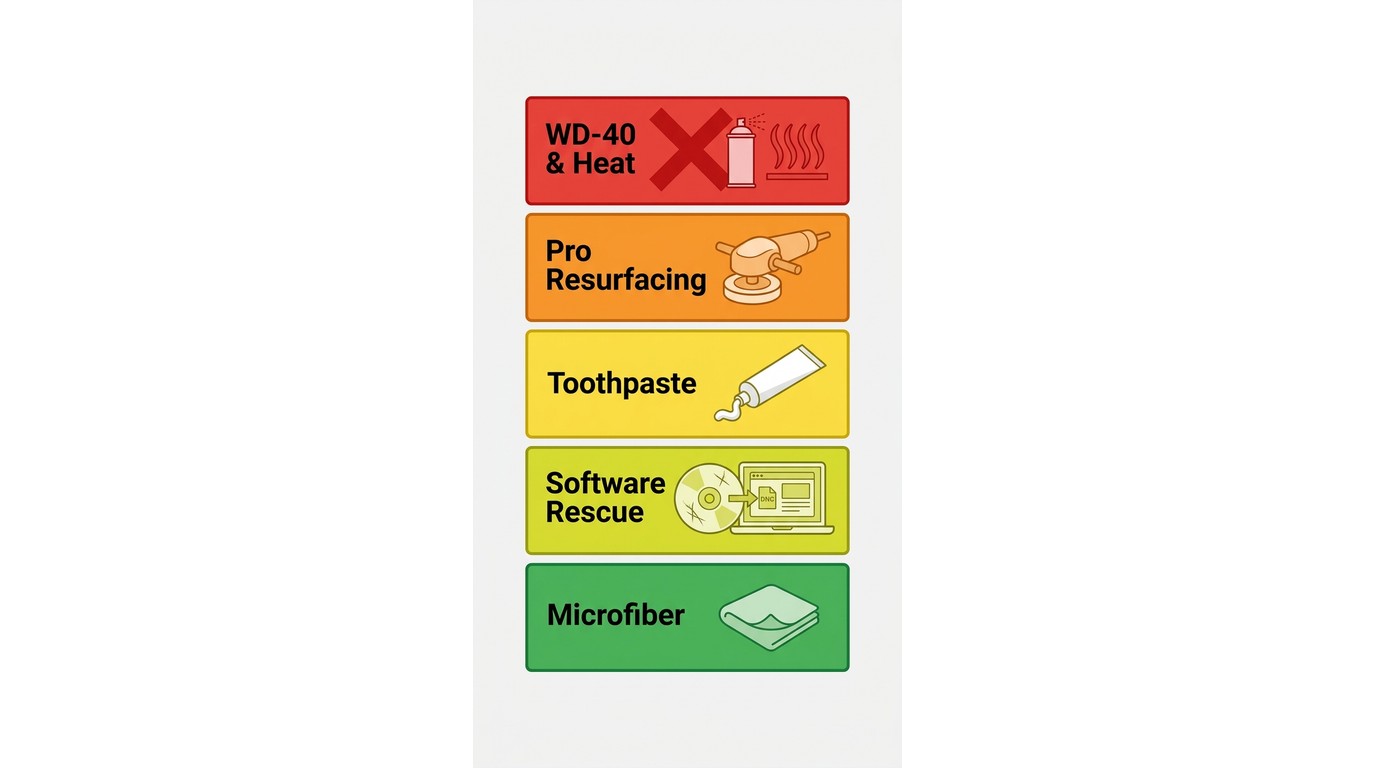
The safest order is cleaning, rescue, one restricted abrasive attempt on a non-critical disc, and professional DVD resurfacing. Household oils, food residue, direct heat, and repeated polishing create more risk than useful evidence.
- Direct heat can warp the disc.
- Circular rubbing can create track-following damage.
- WD-40, petroleum jelly, banana, and peanut butter leave residue.
- Harsh solvents can cloud or weaken the polycarbonate surface.
- Whitening or gritty toothpaste can add scratches.
- Repeated polishing removes more material; stop after one cautious attempt.
Toothpaste and Mild Abrasives
Toothpaste DVD repair belongs at the end of the home options, not the beginning. Consider it only for a light surface scratch on a replaceable or already backed-up disc. Deep, clustered, label-side, and irreplaceable damage should not be polished at home.
- Confirm that readable data has already been rescued.
- Choose a plain, smooth toothpaste without whitening particles or gritty additives.
- Apply a very small amount with a clean, soft cloth.
- Use light center-to-Edge strokes, never circles.
- Rinse away the residue, dry the disc fully, and test once.
A mild abrasive may smooth a shallow mark, but it also removes material. My stop rule is one cautious attempt; adding more abrasion to an uncertain scratch is usually a worse tradeoff than paying for resurfacing.
Repairs That Can Make Damage Worse
WD-40 disc repair, petroleum jelly, banana, and peanut butter can coat the surface without restoring damaged data. Direct heat can warp the disc, and circular rubbing can extend damage along the data path. Harsh cleaners can also cloud the polycarbonate.
If a method depends on filling a scratch with oil, heating the disc, or repeating abrasive passes until playback changes, skip it. Temporary readability is not evidence that the surface is safe or repaired.
Professional Resurfacing and Repair Options
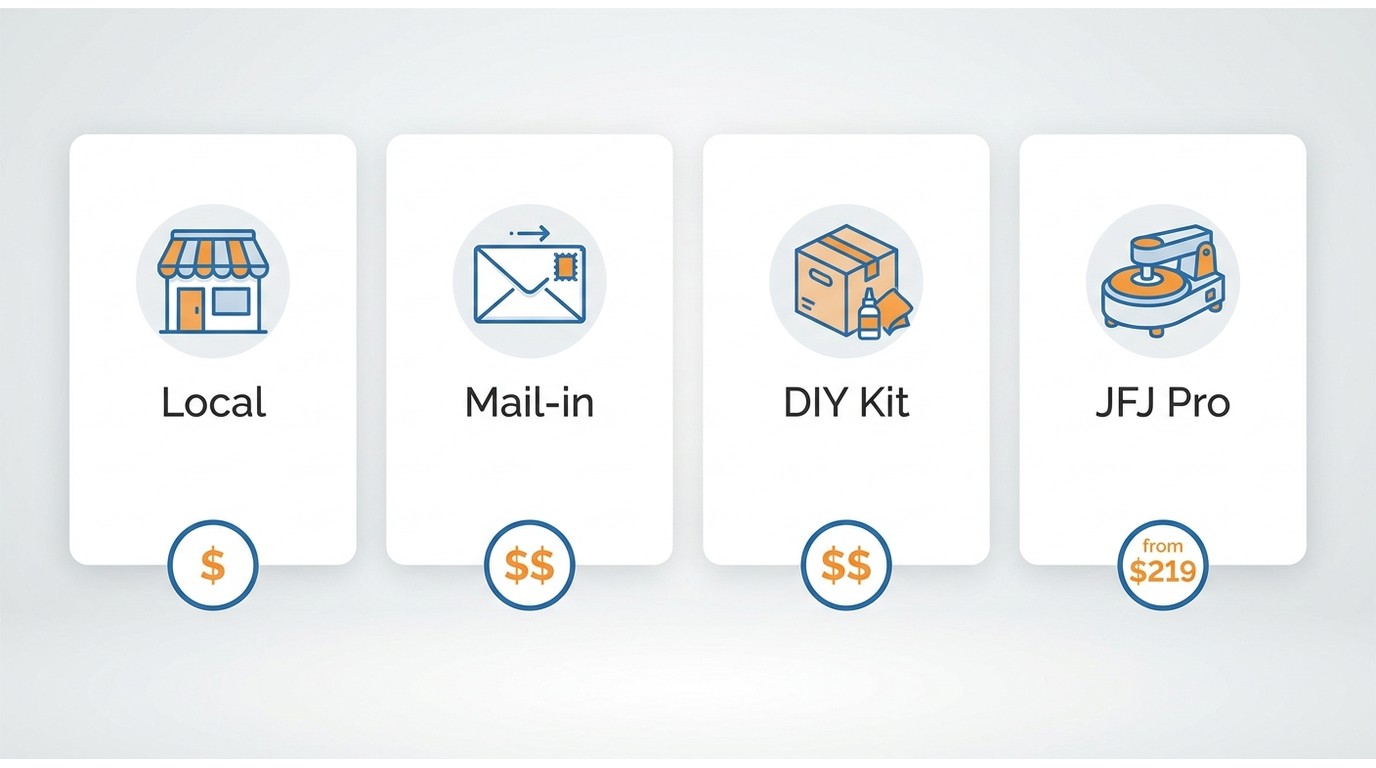
Professional resurfacing is the next step for valuable discs with surface damage that cleaning did not solve. It may improve readability, but it cannot promise recovery from a deep gouge, split, warp, or damaged data layer.
Local Resurfacing Services
Ask libraries, record stores, used-media shops, game shops, and specialist disc services whether they resurface DVDs. A local service often makes more sense for one or a few discs because you can describe the symptoms and avoid buying equipment.
- Ask whether the service handles DVDs, not only CDs or game discs.
- Describe whether the disc skips, freezes, mounts intermittently, or does not mount.
- Ask about the DVD repair cost, turnaround, repeat-pass policy, and any guarantee limits.
For an irreplaceable disc, tell the service not to polish until it has assessed the damage. Surface correction and data recovery are different tasks.
Repair Kits and Machines
A consumer DVD scratch remover can suit occasional light marks, while a powered machine is intended for repeated use. Pressure control, consumables, and operator technique still affect the result.
| Option | Works well for | Typical cost | Main limitation | Risk |
|---|---|---|---|---|
| Local media-store resurfacing | One or a few discs | Low | Local availability | Low to moderate |
| Mail-in repair service | Valuable discs | Moderate plus shipping | Turnaround time | Low to moderate |
| Consumer repair kit | Occasional light scratches | Low to moderate | Uneven pressure | Moderate |
| JFJ Easy Pro machine | Repeated collection work | $219.90–$249.90 | Upfront cost | Moderate |
Price note: JFJ Easy Pro was listed at $219.90–$249.90 as of August 2026.
Aleratec DVD/CD Disc Repair Plus is now mainly a legacy or used-market unit, without a current official United States price. For one or a few discs, I would try a local service before buying a machine; equipment makes more sense for recurring collection work.
Prevent Future Scratches and Data Loss
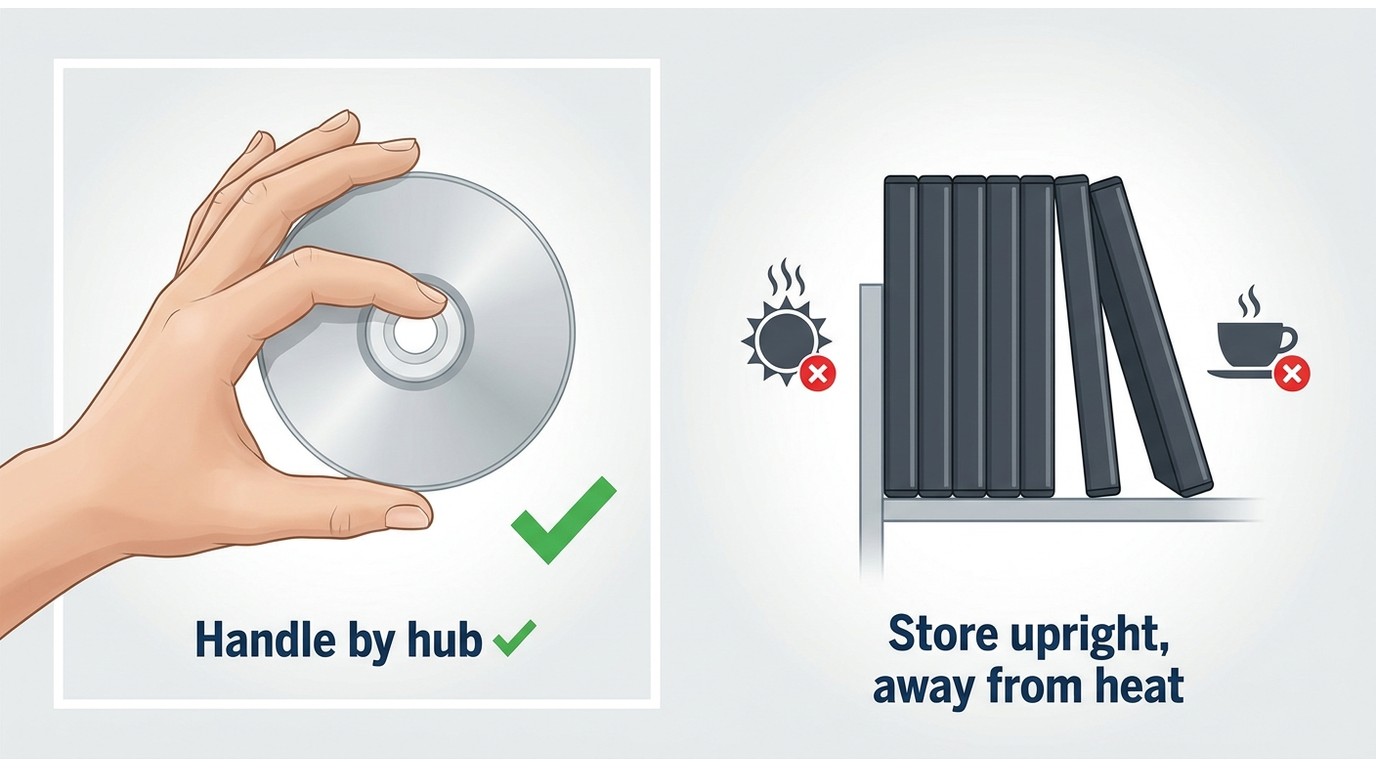
Prevention is simpler than another DVD repair attempt. Handle the disc at the hub and Edge, return it to a clean case, and create an authorized backup while the drive still reads it cleanly.
Handle and Store Discs Safely
- Touch only the hub and outer Edge.
- Store discs vertically in individual cases.
- Keep the read side away from grit, paper sleeves, and abrasive surfaces.
- Keep cases away from direct heat, moisture, and strong sunlight.
- Clean a disc before placing it in a drive if residue is visible.
Create an Digital Backup Workflow
Another way to prevent DVD scratches and data loss is to rip DVD content to digital formats. DVDneXtCOPY DVD Ripper is a reliable tool that can help you rip a protected DVD to any audio or video file in about 5 minutes. So you can still access it free from concerns about data loss or DVD scratches.

Frequently Asked Questions
Can WD-40 safely remove scratches from a DVD?
No. WD-40 may make a mark look different for a short time, but it leaves oily residue and does not restore damaged data. Clean the disc with a lint-free cloth and use risk-ranked repair options instead.
AWhy can an ISO copy work when MP4 conversion fails?
An image can preserve readable sectors and disc structure, while an ISO to MP4 transcode may stop when it reaches a damaged area. Rescue the source first, confirm that it opens, and convert only a clean extraction.
AIs it legal to convert a DVD to MP4 in the United States?
Ownership alone does not settle every copyright question involving technological protection measures. Limit DVD to MP4 work to content you own or are authorized to use, where permitted by applicable law, and do not distribute the result. This is general information, not legal advice.
ACan software recover files from a scratched DVD?
Software can copy sectors the drive still reads, but it cannot remove a physical scratch or reconstruct physically lost data. A disc that will not mount, or one with deep structural damage, may need professional recovery.
AConclusion
The safest way to fix scratched DVD playback is a five-step stop-loss sequence. Each step should protect the readable data before the next step adds contact or abrasion.
- Inspect: separate dirt, light radial marks, track-following scratches, and structural damage.
- Clean: use a lint-free cloth and center-to-Edge strokes.
- Rescue: save the broadest readable source before polishing.
- Repair once: try one cautious low-risk method only on a replaceable or backed-up disc.
- Escalate: choose resurfacing, specialist data rescue, or replacement when the stop rules are met.
For an irreplaceable disc, preserving what remains matters more than testing another internet remedy. Stop when the disc has a visible split, is warped, deeply gouged, repeatedly unreadable, or unchanged after one careful attempt.
![Top 8 Best MP4 to DVD Converters on Windows & Mac [2026 Tested]](https://images.dvdnextcopy.com/2026/09/17/I2v69nzxIF6Xn7iue3ZRMGJ5-Ls0SF_z/feature_cover.jpg) Luna MillerSep 21, 2026
Luna MillerSep 21, 2026Top 8 Best MP4 to DVD Converters on Windows & Mac [2026 Tested]
 Luna MillerSep 21, 2026
DVD Region Codes Explained: Region 1 and Playback Options
![How to Remove DVD Copy Protection: Software and Free Methods [2026]](https://c.dvdnextcopy.com/media/How_to_Remove_DVD_Copy_Protection_d24c38a790.png) Steven VanceSep 21, 2026
Steven VanceSep 21, 2026How to Remove DVD Copy Protection: Software and Free Methods [2026]
 Luna MillerSep 21, 2026
How to Rip a Copy-Protected DVD on Win & Mac: 6 Ways
 Steven VanceSep 18, 2026
Top MP4 to ISO Converter in 2026: DVD Authoring vs Online Tools
 Steven VanceSep 18, 2026
How to Digitize DVD Collection: 5 Ways in 2026