 DVDneXtCOPY DVD Creator
How to Burn Video to DVD in 2026: 4 Ways to Make a Playable Disc

Summary: To burn video to a DVD that plays like a movie disc, the video must be authored as DVD-Video instead of copied as an MP4 or MKV file. DVDneXtCOPY DVD Creator is my first Windows choice; DVDStyler adds free, detailed menu control, DVDFab adds macOS support and editing, and Freemake offers a simpler Windows workflow. For file storage only, burn a data DVD instead.
Table of Contents
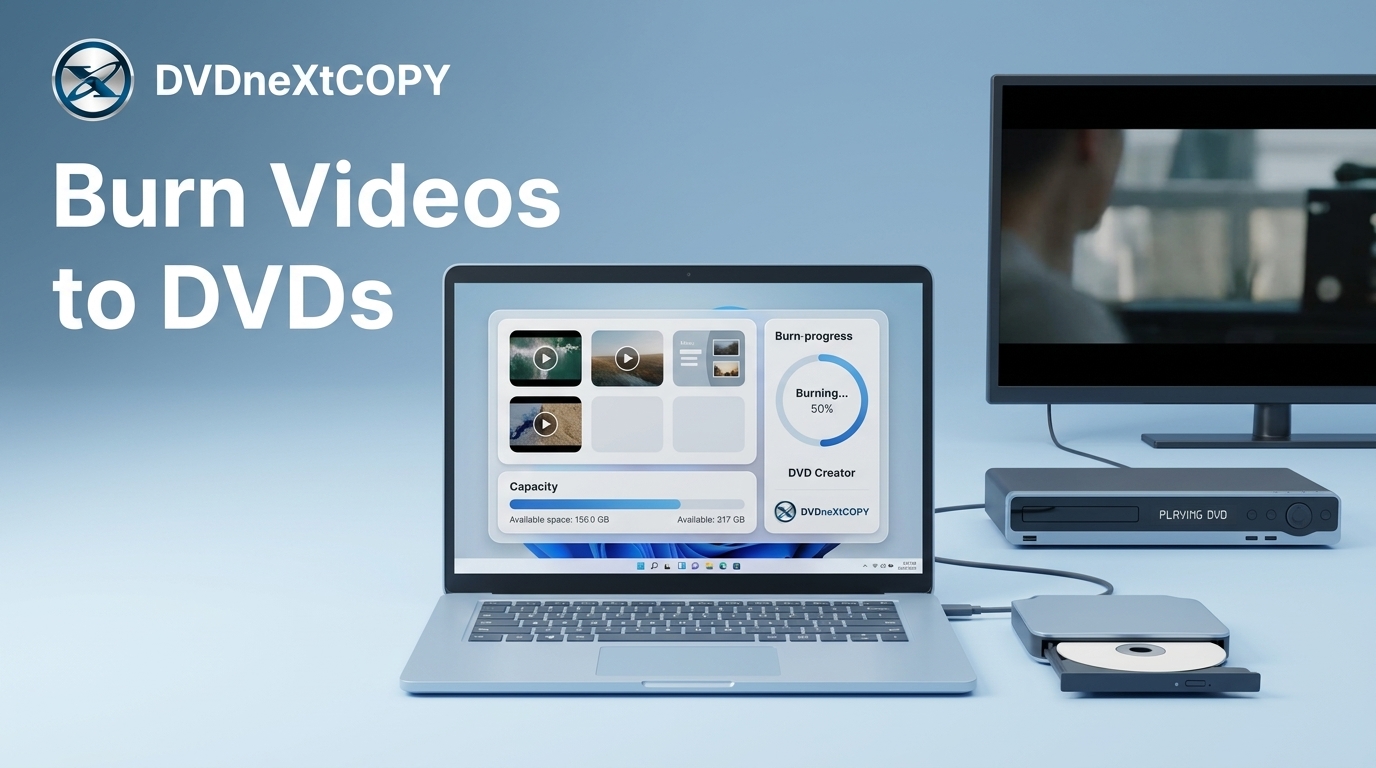
A phone video, camera clip, or old home movie is easy to watch on a computer, but a physical DVD is still useful when you want to play it on a living-room DVD player or hand the disc to someone else. The important difference is how the disc is made: copying an MP4 or MKV as a normal file creates a data DVD, while a playable movie disc needs video to DVD burning.
In this guide, I separate those two outputs first, then show four ways to burn video to DVD with DVDneXtCOPY DVD Creator, DVDStyler, DVDFab DVD Creator, and Freemake. You will see how to choose DVD-5 or DVD-9, set NTSC or PAL, create a menu, select the final disc/ISO/folder output, and decide when a simple data DVD is enough instead.
Playable DVD vs. Data DVD: What You Create When You Burn Video
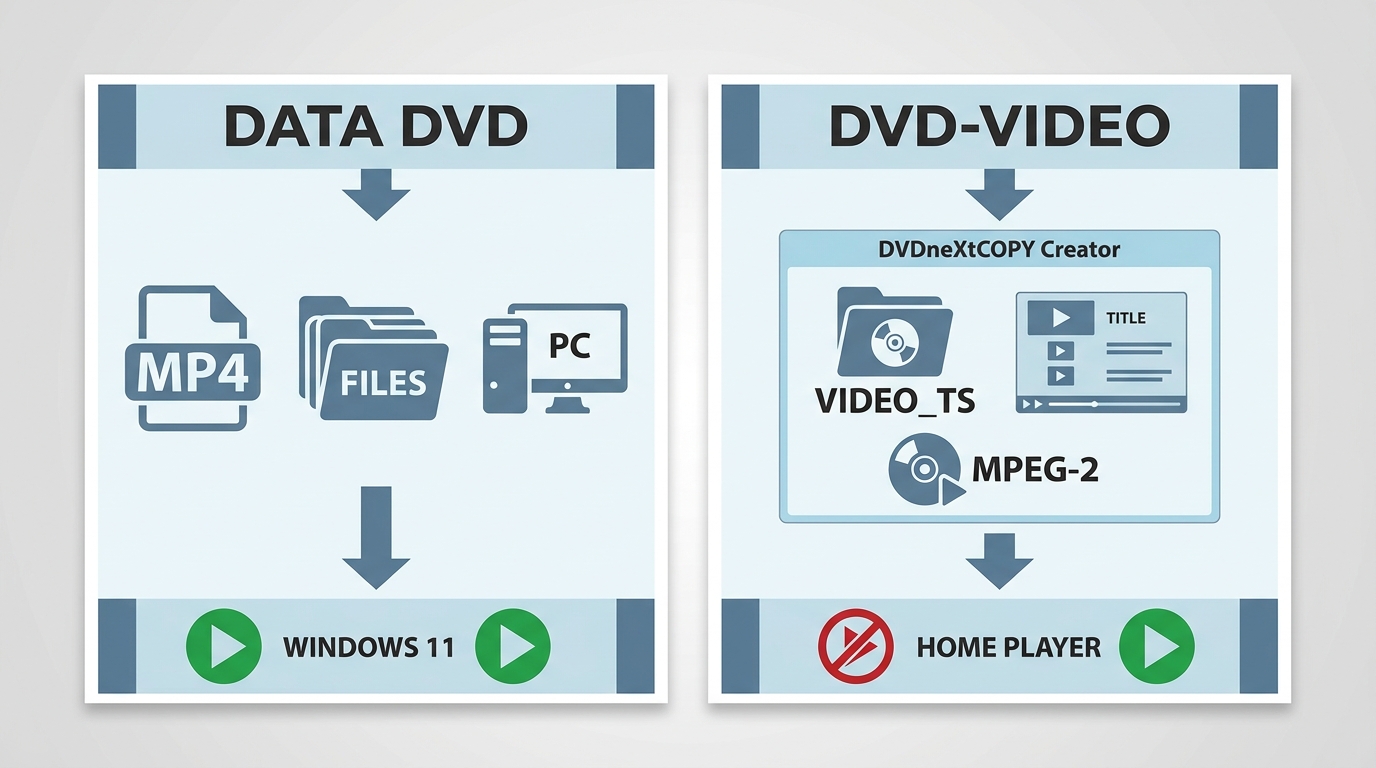
A playable DVD and a data DVD can use the same blank media, but they are not the same output. DVD-Video contains an burned disc structure for movie playback, while a data DVD keeps the original computer files such as MP4 or MKV.
| Goal | What the Disc Contains | How to Create It |
|---|---|---|
| Watch the video like a movie DVD | DVD-Video structure with authored video, titles, chapters, and an optional menu | Use DVD creator software |
| Store the original video files | MP4, MKV, MOV, or other files remain in their original computer formats | Burn a data DVD |
A data DVD is useful for storage or for devices that explicitly support the files on the disc. It does not automatically provide the menu, navigation, and DVD-Video structure expected by a conventional DVD player.
What You Need to Burn Video to DVD
- Use a writable DVD drive and blank DVD media. DVD-R and DVD+R work well for finished projects, while DVD-RW and DVD+RW can be erased and reused.
- Disc capacity affects how much video can fit before the burning software has to reduce bitrate. DVD-5 is a single-layer disc with about 4.7 GB of capacity, while DVD-9 is dual-layer with about 8.5 GB. Select NTSC or PAL for the playback system used by the target DVD player, and keep enough free disk space for temporary authoring files.
- You do not need to convert MP4 or MKV to MPEG-2 manually before importing it. A DVD Creator handles the DVD-compatible encoding and disc structure during authoring.
Quick Answer: 4 Ways to Burn Video to DVD
The four tools below all create DVD-Video rather than merely copying the source file to disc. Compare the operating system, disc settings, menu controls, and available outputs before choosing a method.
| Comparison | DVDneXtCOPY DVD Creator | DVDStyler 3.2.1 | DVDFab DVD Creator 13.0.6.5 | Freemake DVD Burner 6.0.1 |
|---|---|---|---|---|
| OS | Windows | Windows / macOS / Linux | Windows / macOS | Windows |
| Video Input | MP4, MKV, MOV, AVI and 200+ formats | AVI, MOV, MP4, MPEG, OGG, WMV and other common formats | MP4, MKV, MOV, AVI and 200+ formats | AVI, MP4, MKV, WMV, MOV, FLV and others |
| Creates Playable DVD-Video | Yes | Yes | Yes | Yes |
| DVD-5 / DVD-9 | Yes | Yes | Yes | 4.7 GB / 8.5 GB options available |
| NTSC / PAL | Yes | Yes | Yes | Yes |
| Menu & Chapters | Template menu with editable text, background, thumbnails, and buttons | Detailed manual menu/navigation control | Template menu with customizable visual and playback elements | Template/custom-background menu with automatic chapter division |
| Video Editing | No | No | Yes | No |
| Output | DVD Disc / ISO / Folder | DVD-Video project / Disc | DVD Disc / ISO / Folder | DVD Disc / ISO / Folder |
| Best For | Straightforward Windows burning and repeatable ISO output | Free burning with detailed menu/navigation control | Cross-platform burning with built-in video editing | Basic Windows DVD projects with a short setup flow |
Method 1: How to Burn Video to DVD with DVDneXtCOPY DVD Creator
DVDneXtCOPY DVD Creator is a video to DVD burner that can author MP4, MKV, MOV, AVI, and more than 200 other video formats as DVD-Video. Several clips can become separate titles behind one menu, which makes a multi-video disc easier to browse from a TV or DVD player. Additionally, before burning the DVD with a menu, you can customize settings such as output quality, volume label, TV standard (NTSC/PAL), aspect ratio (16:9/4:3), and playback mode.
For a disc with several home videos, I would keep the menu simple and use the title order to make each clip easy to find. Saving an ISO also makes sense when another physical copy may be needed later because the project does not have to be authored again.
- Audio-track selection and external subtitle support help combine clips that do not all use the same language or subtitle setup.
- The built-in preview lets you inspect the authored menu before writing a recordable DVD.
- The 30-day trial is limited to three DVD creations.
Step 1: Add the Video Files
Open DVDneXtCOPY and select Creator > DVD Creator. Click Add, or drag the source videos into the main window.

Step 2: Choose DVD Size, TV Standard, Audio, and Subtitles
Open Advanced Settings. Select DVD-5 or DVD-9, choose NTSC or PAL, set the aspect ratio, and keep the audio and subtitle tracks required for the finished DVD.

Step 3: Create the DVD Menu and Preview
Click Menu Settings. Choose a template, then edit the background, title text, thumbnails, and buttons. Use Preview to check the title order and navigation.

Step 4: Select DVD, ISO, or Folder and Start to Burn Your Video to DVD
Insert a blank DVD and select the optical drive in the output area. Choose the ISO or folder option instead if you want a file output. Click Start to begin burning.

Method 2: How to Burn Video to DVD Free with DVDStyler
DVDStyler is a free, open-source DVD burning program for Windows, macOS, and Linux. Project settings for disc capacity and NTSC/PAL appear before the video is added, while its menu editor gives direct control over buttons, titles, chapter links, backgrounds, and navigation.
I would use DVDStyler when the menu needs more manual control than a template-first creator provides. That extra setup is useful for discs with several titles or chapter pages, although it takes more time than choosing a ready-made menu and moving straight to the burn.
- It is free and open source, with current downloads for Windows, macOS, and Linux/source packages.
- DVD-compliant MPEG/VOB sources can be used without re-encoding in supported cases, which can avoid an unnecessary conversion step.
- DVD scripting and object-level menu controls allow navigation behavior beyond a fixed template.
- The stable 3.2.1 release dates from 2021; the newer 3.3 line is still beta.
Step 1: Create a DVD Project and Set Capacity/NTSC/PAL
Launch DVDStyler and choose Create a new project. Enter the disc label, choose 4.7 GB or 8.5 GB, select NTSC or PAL, and click OK.

Step 2: Add the Video Clips
Open the File Browser panel, locate the source files, and drag the videos onto the Titleset Manager at the bottom of the window.

Step 3: Build the DVD Menu and Chapters
Choose a menu template or edit the menu objects manually. Add or change buttons, text, backgrounds, title links, and chapter navigation as needed.

Step 4: Preview and Burn the DVD
Click Burn, enable Preview if you want to check the finished project first, select the DVD writer, and start the authoring process.
Method 3: How to Burn Video to DVD with DVDFab DVD Creator
DVDFab DVD Creator can burn more than 200 video formats into DVD-Video and outputs to DVD disc, ISO, or folder. The burning controls let you match the disc size and TV standard to the target player, while the menu editor organizes several videos into titles that are easier to select from a DVD menu.
The built-in video editor is useful when a source still needs trimming, cropping, subtitle changes, or a simple color adjustment before authoring. For finished videos, I would skip those tools and go directly to the DVD settings and menu. DVDFab also provides both Windows and macOS versions.
- Playback mode can be set to open the menu first, start the first title, or play titles in sequence.
- External SRT/ASS subtitles can be added during burning instead of being prepared in a separate subtitle tool.
- The menu can be previewed after changing backgrounds, text, thumbnails, and playback buttons.
- DVD Creator is shareware; continued use after the 30-day evaluation period requires a paid license.
Step 1: Load the Source Videos
Launch DVDFab and select Creator > DVD Creator. Click Add or drag the video files into the interface.

Step 2: Configure the DVD
Open Advanced Settings. Select DVD-5 or DVD-9, choose NTSC or PAL, set the aspect ratio, and select the audio and subtitle tracks you want to keep.

Step 3: Edit the Menu or Video if Needed
Open Menu Settings to choose and customize a DVD menu. Use Video Edit when the source still needs trimming, cropping, subtitle changes, filters, or other adjustments.

Step 4: Choose the Output and Start
At Save to, select the DVD writer for a physical disc, or choose ISO/folder output. Click Start to create the DVD.
Method 4: How to Burn Video to DVD with Freemake DVD Burner
Freemake DVD Burner converts common files such as AVI, MP4, MKV, WMV, MOV, and FLV into DVD-Video. Its DVD output screen keeps the menu, disc type, aspect ratio, and PAL/NTSC settings together, so a short home-video project can be configured without moving through several separate panels.
Freemake keeps the main DVD controls close to the final to DVD action, so it suits a short project that does not need detailed menu programming. DVDStyler offers finer navigation control when individual menu objects and chapter pages need more editing.
- Custom-background menus and automatic chapter division cover the basic navigation needs of a home-video DVD.
- The same project can be sent to a DVD writer or saved as an ISO/DVD folder for later burning.
- The free version adds Freemake branding to converted output; removing the logo requires the paid Remove Branding pack.
- Added subtitles are burned in as hardsubs, so they cannot be switched off during playback.
- The current DVD Burner is Windows-only.
Step 1: Add the Videos
Launch Freemake and click +Video. Select the video files you want to put on the disc.

Step 2: Choose to DVD and Configure the Project
Click to DVD. Choose the DVD menu, subtitles, and PAL or NTSC setting, then review the project size.

Step 3: Select the Destination and Burn
Choose the DVD drive for a physical disc, or select ISO/folder output when needed. Insert the blank disc and start the burn.

After burning a DVD-Video project, load the disc in the DVD player you plan to use and open the menu, the first title, and at least one chapter. If playback fails, recheck the TV standard, disc type, and authoring settings before burning another disc.
Can You Burn Video to DVD Without DVD Authoring?
Yes, but the result is a data DVD rather than a standard DVD-Video disc. Windows and other disc-burning utilities can copy MP4, MKV, MOV, and other files directly to a blank DVD without changing their format.
A computer can read those files, and some standalone players may also play them if they support the container and codecs. A traditional DVD player expects a DVD-Video structure, so use burning software when the goal is a movie-style disc with titles, chapters, or a menu. For ordinary file storage, see the separate guide on how to burn a DVD.
FAQs
You can burn an MP4 directly as a file, but that creates a data DVD. Playback then depends on whether the DVD player supports MP4 and the codecs inside the file. For standard DVD-Video playback, import the MP4 into DVD burning software so the program can create the DVD structure before burning. For a complete MP4-specific process, see how to burn MP4 to DVD.
DVD-Video uses DVD-compatible MPEG-2 video rather than MP4, MKV, or MOV as the final movie format. You normally do not need to convert the source manually because DVD burning software creates the required DVD-Video files during the authoring process.
Use DVD-5 for a smaller project that fits comfortably on a single-layer disc. DVD-9 provides more capacity for longer projects or higher bitrates. The better choice depends on video length, selected quality, audio tracks, menu content, and how much compression would be needed to fit the project.
A standard DVD-Video disc is an SD format, so a 1080p or 4K source has to be downconverted to DVD-compatible resolution during authoring. The source can still be imported at its original resolution, but the finished DVD will not remain 1080p or 4K. If preserving HD resolution on an optical disc is the goal, Blu-ray is more suitable.
Conclusion
To burn video to a DVD that works like a movie disc, use DVD authoring rather than ordinary file burning. DVDneXtCOPY DVD Creator is my main Windows recommendation for a straightforward project with several videos, a menu, DVD-5/DVD-9 output, and ISO/folder options. DVDStyler is the stronger free choice when detailed menu and chapter control matter. DVDFab DVD Creator adds macOS support and built-in editing for source videos that still need changes before burning, while Freemake offers a simpler Windows route for basic DVD projects. If the goal is only to store MP4, MKV, or other files on the disc, a data DVD is enough, but it is not the same output as DVD-Video.
![Top 8 Best MP4 to DVD Converters on Windows & Mac [2026 Tested]](https://images.dvdnextcopy.com/2026/09/17/I2v69nzxIF6Xn7iue3ZRMGJ5-Ls0SF_z/feature_cover.jpg) Luna MillerSep 21, 2026
Luna MillerSep 21, 2026Top 8 Best MP4 to DVD Converters on Windows & Mac [2026 Tested]
 Luna MillerSep 21, 2026
DVD Region Codes Explained: Region 1 and Playback Options
![How to Remove DVD Copy Protection: Software and Free Methods [2026]](https://c.dvdnextcopy.com/media/How_to_Remove_DVD_Copy_Protection_d24c38a790.png) Steven VanceSep 21, 2026
Steven VanceSep 21, 2026How to Remove DVD Copy Protection: Software and Free Methods [2026]
 Luna MillerSep 21, 2026
How to Rip a Copy-Protected DVD on Win & Mac: 6 Ways
 Steven VanceSep 18, 2026
Top MP4 to ISO Converter in 2026: DVD Authoring vs Online Tools
 Steven VanceSep 18, 2026
How to Digitize DVD Collection: 5 Ways in 2026