 DVDneXtCOPY DVD Creator
How to Make Your Own DVD on Windows and Mac in 2026

Summary: To make your own DVD, author video files into DVD-Video rather than copying them as data. DVDneXtCOPY DVD Creator combines 200+ video inputs, GPU-assisted processing, editable templates, preview, multiple-video projects, and DVD/ISO/folder output in one guided Windows workflow; DVDStyler offers free cross-platform authoring with deeper manual menu control. Standard DVD-Video remains SD even when the source is HD or 4K.
Table of Contents
A set of family videos, recorded clips, or downloaded MP4 and MOV files can be easy to watch on a computer but less convenient when you want one disc with a menu and normal DVD-player navigation. Copying those files onto a blank DVD only creates a data disc; making your own movie DVD requires authoring the videos into DVD-Video.
When I make a DVD from video files, I first check the disc capacity and the DVD player I plan to use, then build the titles and menu before writing anything to the blank disc. Below, I’ll show a guided Windows method with DVDneXtCOPY DVD Creator and a free cross-platform method with DVDStyler, then explain how to check the finished disc before you keep or share it.
Before You Start: What Does “Make a DVD” Mean?
In this guide, making a DVD means turning your own video files into a standard DVD-Video structure that can be played in a conventional DVD player. If you only copy MP4, MOV, MKV, photos, or documents onto a blank disc, you are creating a data DVD rather than authoring a movie DVD. Built-in tools are enough when you only need to burn files to a data DVD, but a playable DVD-Video requires DVD creator software.
What You Need to Make Your Own DVD
- Source video files: Prepare the MP4, MOV, MKV, AVI, or other videos you want to place on the disc.
- A writable DVD drive: The optical drive must support DVD writing. Many newer laptops and Macs require an external USB DVD writer.
- A blank DVD: DVD-R and DVD+R are common write-once choices. A compatible rewritable disc can be useful when you want to test a project more than once.
- Enough disc capacity: DVD-5 is commonly sold as 4.7 GB, while DVD-9 is commonly sold as 8.5 GB.
- DVD authoring software: The software encodes the source video for DVD, builds the DVD structure and menu, and writes the finished project to disc or saves it as an ISO/folder.
Which DVD-Making Method Should You Use?
DVDneXtCOPY and DVDStyler both burn playable DVD videos, but they take different approaches. DVDneXtCOPY combines 200+ video inputs, GPU-assisted processing, editable menu templates, preview, and DVD/ISO/folder output in one guided Windows interface. DVDStyler is free and cross-platform, with more manual control over menu objects, button actions, and navigation.
| Criteria | DVDneXtCOPY DVD Creator | DVDStyler |
|---|---|---|
| OS / License | Windows 30-day trial (up to 3 DVD creations) / Paid |
Windows / macOS / Linux Free / Open Source |
| Video Input | 200+ formats, including MP4, AVI, MOV, and MKV | Common formats including AVI, MOV, MP4, MPEG, OGG, and WMV |
| GPU Acceleration | Yes, documented for supported processing tasks | Not documented; official materials list multi-core CPU support |
| Multiple Videos in One Project | Yes | Yes, through multiple titles/titlesets |
| Menu Workflow | Ready-made templates with editable fonts, backgrounds, thumbnails, and menu elements | Templates plus manual placement of text, buttons, images, and navigation actions |
| Authoring Settings | Disc type, aspect ratio, quality, audio tracks, subtitles, and output destination in one workflow | Project size, NTSC/PAL, aspect ratio, titlesets, audio/subtitle tracks, and DVD scripting |
| Preview | Built-in real-time preview | Preview before burning |
| Output | DVD disc / ISO / DVD folder | DVD disc / ISO |
| Workflow Style | Guided, template-first authoring with centralized settings | Manual, object-based authoring with deeper navigation control |
| Main Advantage | Reduce setup work with GPU-assisted processing, editable templates, preview, and flexible output choices in one interface | Get free cross-platform authoring with detailed menu and navigation control |
How to Make Your Own DVD with DVDneXtCOPY DVD Creator
DVDneXtCOPY DVD Creator can make DVDs from MP4, MKV, MOV, AVI, and more than 200 video formats on Windows. It can combine multiple videos in one project, add audio or subtitle tracks, and output the finished project as a physical DVD, ISO image, or DVD folder. Disc type, aspect ratio, quality, menu templates, and preview are handled inside the same authoring module.
Its stronger point is the combination of GPU-assisted processing and guided authoring controls. The interface keeps disc settings, menu templates, audio/subtitle selection, preview, and output destination in one sequence, while the menu editor starts from ready-made templates but still lets you replace backgrounds and adjust fonts, thumbnails, and other elements. Compared with DVDStyler's more manual object-based editor, DVDneXtCOPY requires less layout work while retaining useful menu customization. Its main limits are Windows-only availability and the paid license required after the trial.
Step 1: Add Your Videos to DVD Creator
Launch DVDneXtCOPY and open Creator > DVD Creator. Click Add or drag the source video files into the main interface.

Step 2: Set the DVD Size and Video Options
Open Advanced Settings. Choose the target disc size, such as DVD-5 or DVD-9, then set the available TV standard, aspect ratio, quality, and playback options.
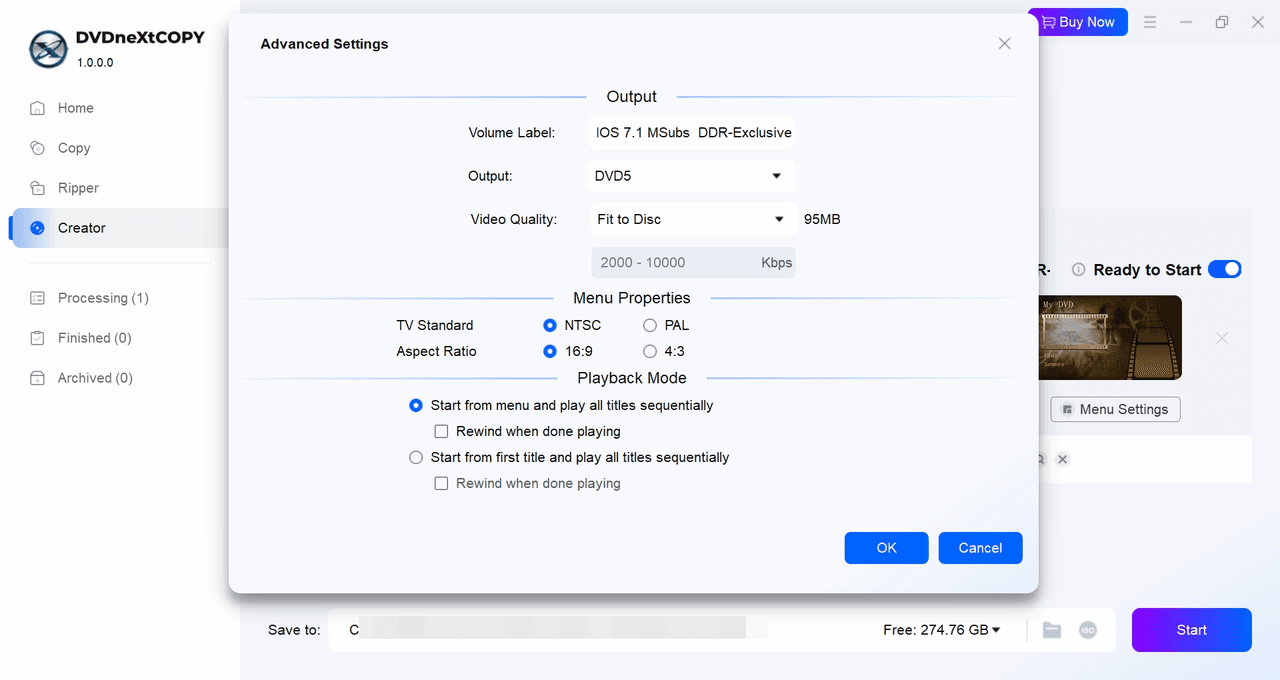
Return to the main interface to select the audio and subtitle tracks you want to include.

Step 3: Build and Preview the DVD Menu
Click Menu Settings, choose a template, then edit the menu text, font, color, background, thumbnails, and navigation elements. You can also create a custom DVD menu with more detailed design choices when the project needs deeper menu customization. Return to the main interface and click Play to preview the menu and video.

Step 4: Burn the DVD or Save an ISO/Folder
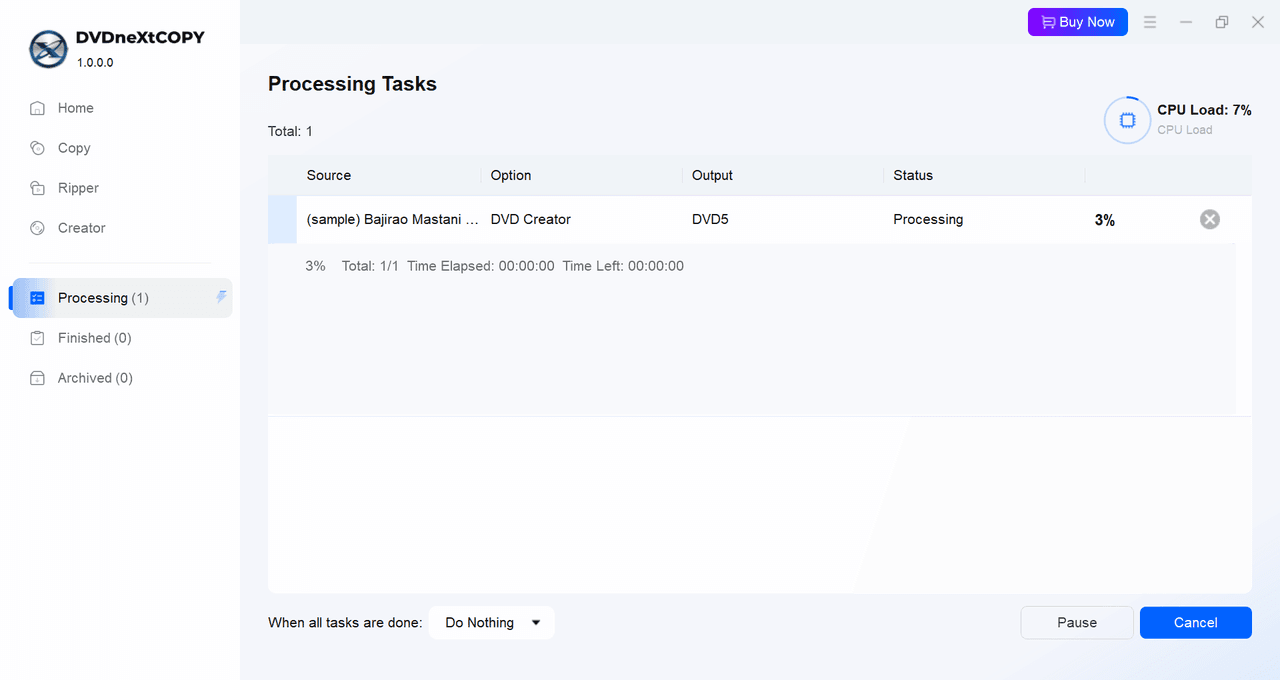
Insert a blank DVD and select the optical drive as the output destination. To create the project without writing a physical disc immediately, choose the ISO or Folder output instead. Click Start to begin DVD creation.
How to Make a DVD Free with DVDStyler
DVDStyler is free, open-source DVD authoring software that can create and burn DVD-Video from formats including AVI, MOV, MP4, MPEG, OGG, and WMV. It supports interactive menus, multiple audio and subtitle tracks, multiple titlesets, custom backgrounds, buttons, text, and DVD navigation.
DVDStyler gives you more direct control over individual menu objects and button actions than a template-focused creator, but its authoring interface is more manual. Version 3.2.1 remains the current stable release, with 3.3b3 available as a beta. The current Mac installer requires macOS 10.15 Catalina or later.
Step 1: Create a DVDStyler Project
Launch DVDStyler and select Create a new project. Enter the disc label, choose 4.7 GB or 8.5 GB, select NTSC or PAL, set the aspect ratio, and choose a menu template or a simpler starting layout.

Step 2: Arrange Videos in the Titleset Manager
Open the File Browser tab, locate the videos, and drag them into the Titleset Manager. Arrange multiple titles in the order you want them to appear.

Step 3: Design the Menu and Navigation
Choose a menu template or edit the current menu. Use the Backgrounds and Buttons panels to add a background, text, and navigation buttons. Double-click a button to edit its action, title, color, font, and destination.

Step 4: Preview and Burn the DVD
Click Burn. Enable Preview if you want DVDStyler to open the authored project before writing the physical disc. Insert a blank DVD, select the optical drive, and click Start.
How to Check the DVD You Made
A successful burn message only confirms that the software completed the task. I reopen the disc and check the parts that will matter when someone actually watches it.
Start with the DVD menu and make sure each button opens the intended title. Play a section near the beginning, middle, and end of the videos, switch audio and subtitle tracks when included, and test chapter navigation. If possible, also insert the DVD into the standalone DVD player where you plan to use it and check that the player recognizes the disc, the menu responds correctly, and the picture uses the intended 16:9 or 4:3 aspect ratio.
FAQs
You can create the DVD project without a physical burner by saving it as an ISO image or DVD folder. To produce a physical DVD, however, you eventually need a writable DVD drive. You can create the ISO on one computer and write it to a blank DVD later on another computer with a compatible burner.
No. Windows DVD Maker was included with Windows Vista and Windows 7, but Microsoft did not include it in Windows 8 or later versions, including Windows 10 and Windows 11. On a current Windows PC, use maintained DVD authoring software when you need a standard video DVD rather than a data disc.
Standard DVD-Video does not support HD or 4K resolution. A DVD-Video project normally uses up to 720×480 for NTSC or 720×576 for PAL, so a 1080p or 4K source must be converted to standard definition during authoring. A clean high-resolution source can still help avoid starting with poor-quality material, but the finished DVD remains SD.
First check whether you created DVD-Video or simply copied video files onto a data DVD. A normal MP4 stored on a disc is not the same as an authored DVD-Video. If the disc is already DVD-Video, check the disc type, NTSC/PAL setting, authoring result, and whether the DVD player supports the blank media you used. Reopen the project and preview the menu and titles before burning another copy.
Conclusion
Making your own DVD is mainly an authoring task: the source videos need to be converted into DVD-Video, organized into titles and menus, and then written to the blank disc. DVDneXtCOPY DVD Creator keeps those steps together in a guided Windows interface with broad video input, menu editing, preview, and DVD/ISO/folder output. DVDStyler provides a free cross-platform option when you want more manual control over menu objects and navigation.
Whichever method you use, remember that standard DVD-Video is an SD format even when the original video is HD or 4K. Preview the project before burning, then test the finished menu, videos, audio, subtitles, and navigation in the DVD player where the disc will actually be used.
![Top 8 Best MP4 to DVD Converters on Windows & Mac [2026 Tested]](https://images.dvdnextcopy.com/2026/09/17/I2v69nzxIF6Xn7iue3ZRMGJ5-Ls0SF_z/feature_cover.jpg) Luna MillerSep 21, 2026
Luna MillerSep 21, 2026Top 8 Best MP4 to DVD Converters on Windows & Mac [2026 Tested]
 Luna MillerSep 21, 2026
DVD Region Codes Explained: Region 1 and Playback Options
![How to Remove DVD Copy Protection: Software and Free Methods [2026]](https://c.dvdnextcopy.com/media/How_to_Remove_DVD_Copy_Protection_d24c38a790.png) Steven VanceSep 21, 2026
Steven VanceSep 21, 2026How to Remove DVD Copy Protection: Software and Free Methods [2026]
 Luna MillerSep 21, 2026
How to Rip a Copy-Protected DVD on Win & Mac: 6 Ways
 Steven VanceSep 18, 2026
Top MP4 to ISO Converter in 2026: DVD Authoring vs Online Tools
 Steven VanceSep 18, 2026
How to Digitize DVD Collection: 5 Ways in 2026